Friday, June 21, 2019

Combining Like Terms UNO Card Game


Combining Like Terms is taught before they get to me, but it is always good to have a quick review before we start equations. This is one of my favorite additions to the review! You can grab the cards here. I printed on red, green, yellow, and blue paper and then cut. I wasn't sure if I would love it, so I did not laminate. I also made copies of the directions for each group because I tweaked the game play just a little. 


Students shuffled the deck and dealt five cards to each player. I did groups of 4-5 and that worked out well. The deck was placed face down and the game started. 


Once play began, you could lay down a LIKE TERM or LIKE COLOR on your turn. If you did not have a play, you drew one card. If that card didn't play, your turn was over. This differs from real UNO, so make sure you go over the rules or you may have an uprising! 


Skip, Reverse, and Draw Two only worked for their color. The WILD card worked whenever! When a player had one card left, they had to yell UNO...which was hilarious to hear all across the classroom! The player to get rid of all their cards was the winner.


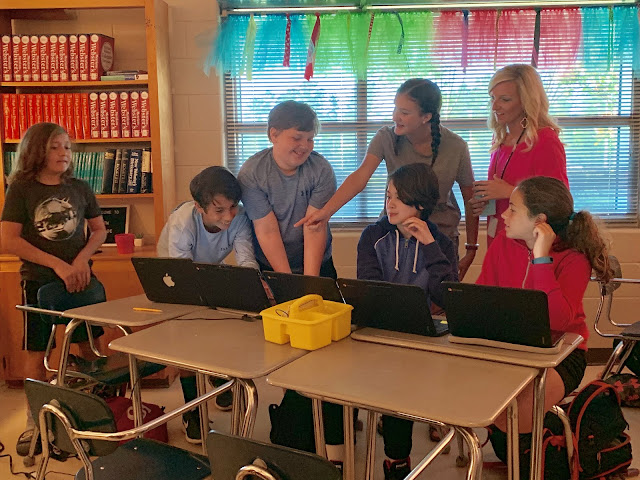
I love friendly competition and my kids got really into this game of UNO. So much so, this group started getting their JRICH Dollars out to bet! Don't worry! I shut it down before any actual bets were placed! They groaned because they wanted to win extra money to use at our Auction. You can read about why money for the Auction is so important here!


Things I would change...put a card stock back to the cards and laminate. It took away some of the strategy and surprise because you could see what colors each player had in their hand. On the set I linked, I added some patterned pages to use for the back of the cards. Other than that, my kids LOVED this! It was amazing to hear them check each other when they played a card that was not like terms. I love when my students speak math! Let me know how it goes if you play with your students, and what we can do to make it better.

Download the UNO Cards Here!


Share:

Saturday, June 8, 2019

Fish In A Tree Stop Motion Mind Movies


My new role as a Curriculum Leader has taken me out of my math world and into all of the other content areas. I have wondered what to do with my math blog, keep it mathy or branch out? While I decide, this is one of my fave activities from this year and I just had to share it with you! 


This job has been perfect for my scatter brain as I search and think about multiple content areas at once! I will be searching for something to use in social studies and find something for science. Squirrel! This culminating activity to a "Fish In A Tree" novel study with sixth graders came about from seeing the Red Ball Challenge on Twitter, #redballchallenge. I wanted to know more about the magic of "connecting" Chromebooks and making a ball bounce across ALL of the screens! Hello stop motion in this mind blowing video that was the inspiration for this activity. Go watch and come back!


Day 1: We showed students the awesome video to inspire them, then had them create the illusion of the red ball transitioning from computer to computer using Google Slides. I followed this video, which gives the best detailed directions on how to create the magic. The hardest part was getting students to understand the timing and adding slides to make transitions from computer to computer work. This visual really helped and everyone rose to the Red Ball Challenge!


In the book, the main character, Ally, struggles to "fit in." To cope, she draws in her Sketchbook of Impossible Things and watches "mind movies," which help her escape from reality. Animating with Google Slides plus the Red Ball Challenge made Ally's mind movies come to life. The mind movies can be found on the pages below, curated from Mrs. Milstead, the teacher who let me try this craziness with her classes.


Day 2: Students discussed with their group what mind movie they wanted to create. Once they had their mind movie chosen, they created a Google Slides to share. We found it was best for them to create one slide together with all the backgrounds and images and then share it with the group to do the stop motion animation. 


Day 3 and forever 4, if we had let them! Students worked super hard on their stop motion mind movies. It was a great collaborative activity because the transitions on the Chromebooks depended on the person before and after you.  


Students became good at making the animation with tiny movements of their images, stop motion pros! They took a lot of time with the details of their mind movies, really capturing the author's descriptions.


Here are just a few of the awesome mind movies students created. Thank you to the fantastic 6th grade English Language Arts teacher, Mrs. Milstead, for always opening your classroom up to me! I loved this activity and this book and that my favorite quote is in it! "Everybody is a genius. But if you judge a fish by its ability to climb a tree, it will live its whole life believing that it is stupid." - Albert Einstein


HERE ARE THE FILES USED


Share:

Saturday, June 1, 2019

Storky Bivariate Data


Bivariate data is one of my fave things to teach because of the real data we can collect as a class. I am always trying to find new ways we can collect data. While looking for ideas, I came across this post written about data collection from Don Steward's blog. I saw "blind stork test" and was immediately curious. Google found for me that athletes use the blind stork test to assess their balance. The premise is simple, you time how long you can stand on one foot with your eyes closed. The timer stops when your foot touches or you open your eyes. 


I emailed Don Steward to make sure I understood his intentions on how to use this data. After clarifying, my class collected data to see if there is a relationship between standing on your right or left foot. Which foot are you more "STORKY" on?! 


I created a Storky Scatter Plot for students to record their data. It was hilarious watching them balance and compare their times. I love that the whole class had to work together to get all the data collected. 


A couple of things I would change. First, I would have each student do it three times and take the best one. I would also be more uncompromising on your foot having to touch your knee. I think this skewed some of the data. You can see the difference in the two pictures above.


The Blind Stork Test is definitely a keeper for data collection! Try it out with your students and you will have them bragging about how "storky" they are for days!


Share:
© No. 2 Pencils | All rights reserved.
Blog Design Handcrafted by pipdig