Monday, October 18, 2021

A Book Tasting for High School


Book Tastings! I was seeing more and more teachers use them as a way to connect students with books they may love. I knew I wanted our students to be a part of an exciting event like this so the planning began. There was nothing out there for high school students! Since I love bringing the excitement of elementary school to high school, I knew I had to adapt. I wanted our students to experience the joy and love of reading for only that purpose.

WHAT IS A BOOK TASTING?!
A stack of books, a menu of the titles, and a little cafe theme to set the mood. Students simply move around to each table and sample books from each that they may be interested in reading. They can look at the covers and read the book jacket or few pages out of the book. It is meant to help them find a new book to read or a new genre to explore.


PLANNING
I started by reading lots of young adult blogs and top 20 lists to get my own list going of books to offer at the book tasting. I partnered with my librarian and she had EVERY book on my list. She is the best at knowing what students will like! The next thing to think about is how to group the books. A lot of book tastings I saw were done by genre. I wanted something a little less structured, so I grouped them by themes. I called them "Today's Specials" and tried to have catchy titles for each!


I also wanted to transform the classroom into a little bistro so I ordered some twinkle lights, checkered tablecloths, tea lights, chef hats and aprons, and plastic silver trays. Dollar Tree never disappoints with silk flowers, vases, and ribbon to make centerpieces. I found a YouTube French bistro playlist that had the perfect cover photo and instrumental music. The teachers and I went all in with creating the Book Bistro feel!


BOOK TASTING DAY
I created a slide deck with all of the books that were being offered for the tasting. Each theme was a "special" and had books that went with that theme. I tried to keep it high interest and relevant for them. The slide deck included a book trailer or review for every book. I also linked to some of the blogs, Instagrammers, and YouTubers that I found so helpful for them to explore more. 


Books were stacked on the silver trays with "menus" and they gave Yelp reviews for each book. At each table, I also put a flip menu with each book's summary so they could read that as well. I included all these different access points to books so they could have it after the book tasting to look back on. 


I was able to do the book tasting with a teacher from every grade level, 9th grade to 12th grade, and can say they were all excited when they walked in and saw the room! The loved finding new books, seeing that Netflix shows they watch were actually books first, and finding other books by authors they knew. It was amazing to see these big kids having so much fun with an elementary idea! I even got a $5 tip! 


I hope you try this in your classroom or with your library media specialist. If you do, please feel free to make a copy of the files below to help get you started!


Share:

Thursday, September 9, 2021

PowerPoint Like a Boss


I use PowerPoint for EVERYTHING! I get asked all the time how I make different forms or slides or handouts and my answer is always POWERPOINT! I even did a professional development session on it and included how to get some great fonts. I received a lot of great feedback from that! I decided to make a short tutorial on my favorite tricks and tips that will make text standout and your backgrounds pop!


I treat my first slide like a mood board. I collect images from Pinterest, Instagram, Google, old PowerPoints, any wallpaper or backgrounds that inspire me and put them on the first slide. This is the beginning of my process and let's me get an overall feel of what I want it to look like. That is why I call it my mood board!


I have talked about color palettes before but I cannot stress enough how much inspiration can be gained from a good one! If you haven't discovered the website Coolors then stop reading now and go PLAY! It is the most fun and most time you will spend finding the perfect color palette! The tutorial shows some tips for using it. Another way to get a good color palette is a google image search with words like "bright color palette, warm color palette, pinks color palette." Once you have your palette, put it on the sides of your "paper" in your powerpoint and use it for all your text and shapes. I also show you how to use the eyedropper with this in the tutorial!


Another website that will add SO much to your PowerPoints and slides is remove.bg! This website lets you drop an image in and it removes the background for you in seconds. This makes adding your images to a background so easy and really makes them stand out.


Other little tricks you will find in the tutorial are how to use the eyedropper to get the exact color you want for text and shapes and how adding an outline to your letters will make them standout. I also show you how to make an image go from a white background to clear with a couple of clicks! I hope the tutorial inspires you and makes you want to PowerPoint Like a Boss!


FILES INCLUDED


CREDIT
Instagram Wallpapers: @shop.callie.danielle and @aperfectblendteaching
Fonts: AG, APL, PB, KG, dafont


Share:

Friday, May 7, 2021

Math Play Date Professional Learning

One of the first things I was tasked with at my new school was planning a whole day of professional learning for the entire math department. My passion is to make math super fun in all the classrooms so I knew I had to make the professional learning fun for my teachers. Every good thing has a theme so that's where I started! I made lists of activities and games and EDTech that I had loved doing in my classroom. I then sorted the list into categories and from there the theme just popped off the page! A MATH PLAY DATE! What math nerd would not want to spend the day "playing" with math?! It was perfect!


Once I started working on the agenda, I was able to group our Play Date into five categories. The hardest part was scaling down the number of activities and choosing which ones to keep because I had way too many! I tried to be intentional with the activities I chose so that they could be adapted for any math course. I wanted the activities to spark ideas for ways they could use it for their course. I created this placemat to be used with sticky notes to jot their ideas down for each section of the day. 


A proper play date would also need decorations to make it feel whimsical! I thought about doing a balloon arch, but thought that was too extra even for me! Plus I needed all the space to set up the activities. So I just went with table centerpieces and the math activities all setup made it complete. 


I wanted the materials and handouts they would use during the PD to feel like an interactive notebook so they could experience the amazing-ness of them! I created a faux notebook with tabs for each section of the agenda and play date. This way they could at least see how one worked.


MOVE
Movement in a classroom is so important! Classrooms that incorporate movement have increased engagement and discourse. It is said that students need to move every 20 minutes. Even if you just have students stand to talk, they are moving! You can be simple or get creative with the movement in your classroom.


Dance Dance Transversal is one of my all time faves! You can read more about how this looks and get my files here. I highly recommend you try this out! Another great moving activity is life-size Twister. Twister works great with vocabulary but could be used for anything. Add it to your review activities! Look at how much fun these math teachers are having at their play date!


MODEL
Math modeling is one of the things I added to my math classroom that really impacted student learning. Modeling is just having students experience as much of the actual process as possible and only jumping in when needed. Give them a general problem like, "How fast does this RC Car go?"or "How many cups would have to stack to equal Mrs. Richardson's height?" Let the students guess the right answer first. Ask them to speculate what information they need to figure it out. Have them draw a sketch and organize the information matters most. 


GAMES
Math games keep the excitement level up! I once had a student tell me that her older brother said all they ever did in my class was play games. And I am totally okay with that! Here are a couple that can be used with any content with little prep for days when you just need a break in the action. Function Auction is one of my all time faves! You can read about it here. ZAP! is the greatest review game of all time and I tell you why here! Basing playing cards on real card games like UNO and Go Fish are always a big hit too. 


TECH
For this PD, I used Desmos and Sphero EDU to get them excited about incorporating tech into their lessons. Marble Slides in Desmos are so addicting and as expected, they did not want to stop! I also have a class set of Sphero robots that I received with grants. The possibilities are endless with these little guys! You can see one way I used them here

CREATE
Math and art are the perfect couple! There are so many math standards found in art, I love incorporating them as often as possible. Again, because I was trying to be general so my teachers could adapt the things learned at this PD for their content, I went generic with origami and being a designer.


I went with modular origami because engineers at BYU are designing solar sails for use in space inspired by origami! Watch this video to see how cool these compliant mechanisms are! Origami has a place in all kinds of geometry standards from constructions to vertex to crease patterns. There are many articles out there about the math behind origami and you will be in awe of them all!


One of my favorite projects is the water park design. This can be used with linear relationships or Pythagorean theorem, and even transversals and angle relationships. For the PD, I had my teachers design it for distance between points using Pythagorean theorem. They had a great time creating! 

My goal for this professional development session was to get them off campus and spark some ideas for ways they could make the math come alive for their students. My passion is creating experiences for students that makes learning fun and makes the math stick. The feedback was overwhelmingly positive and that makes me so happy! I love that they are willing to try new things for their students. Please feel free to use anything from this professional development. The files are below and you can always reach out if you need anything at all!

FILES FROM PD


Share:

Wednesday, April 21, 2021

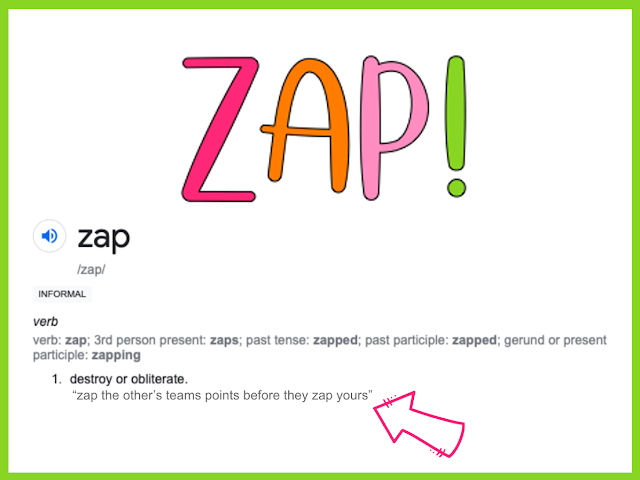
ZAP! Best Review Game Ever!


ZAP! The BEST review game ever! It is super old...I have been using it since literally 2012, which really only adds to its street cred! It is definitely a classic! 

5 REASONS I LOVE ZAP!

1. ZAP! is easy and cheap to create.


The first set of ZAP! cards I made was with library card pockets that I had left over with handwritten index cards inside. I gifted that well used set to a math teacher when I became a coach and needed a new set. I had only one library pocket left, so I made a template from it and used cardstock to create my own. You are welcome to use my template found at the end of the post. Either way, cheap and easy! 

2. ZAP! is almost zero prep.


You just need questions! I have found that 16 is a good number as far as time and interest go. I usually take a blah worksheet or grab practice problems from online to get questions. You can project those or I have even just written them on big paper and held them up. I included a couple of sets for you at the end of this post. EASY prep!

3. ZAP! keeps kids doing math to the very last question! 


Once a team answers the question correctly, they earn 1 point for their team and then draw a card. The cards are all different things like +2 for your team, -3 for your team, switch scores with the other team, and then ZAP! which takes away all points! The cards keep the score going back and forth with the chance of losing all your points. So students work until the very last question because it always comes down to the last card to decide a winner!

4. ZAP! keeps the fastest and most proficient teams from always winning.


I know you have played review games where the fastest thinkers always win and it is not fun for everyone. With ZAP!, there is space for everyone to have a chance. ZAP! is played in teams but EVERY team member has to work the problem. After everyone works it, they chat to come to a consensus before giving the answer. The other team can steal, but they are required to give the answer immediately so they are working at the same time. Every student happily working problems is the best thing!

5. ZAP! creates so much excitement and fun for math!


Drawing the cards is the best part! They are so scared because it could be great or bad for their team's points. They close their eyes and point, they choose based on color, they argue over which one to choose. I have even had kids put their heads on the board to listen for the good one! It is the best!


ZAP! can be used in any content area. I have tried it in ELA and Science and it was a blast with that content as well. I would recommend it for reviewing so that the game stays at a fast pace. Below are a few examples of problem sets I have used. I hope you will try this classic and let me know how it goes! 


GET THE FILES!

Share:

Tuesday, March 23, 2021

Rotations Circle Art


So many math concepts connect directly to visual art. I love to be able to end a concept or unit with art! This project is one of my favorites. It could be used for rigid transformations with rotations, rotational symmetry, measuring angles, and even with the unit circle. The results are incredible and students are always amazed that they created something so beautiful...and with "pencil ink!" Let's get to it because you will love this!

CREATE DESIGN PIECE
Students use one eighth of a circle to create a simple drawing. Simple designs work best because they will be tracing it eight times! The more detailed the design, the less impact it had when finished. 


CREATE THE PENCIL TRANSFER SMUDGE
The next step is to fill the back side of the design piece with pencil lead. Have students place a scratch sheet of paper under their piece while they scribble scrabble on the back creating a solid coat of pencil lead smudge. You will want to use wooden pencils rather than mechanical for this project to ensure the lead transfers. 


TRANSFER THE IMAGE
Place the design piece in the first part of the circle, smudge side down. Hold the design piece in place and trace the lines of the design. Continue tracing over design into each piece of the circle. You will need to press hard to transfer the lead smudge. It may also be necessary to add smudge to the back of the design piece as you go around if the tracing becomes too light. 


FINISH WITH COLOR
Students can choose to continue using pencil to shade or they can use markers, colored pencils, sharpies, whatever they want to fill in the design with color. Some students also used sharpie to outline the design before they colored and it made it look a lot cleaner. The simplest designs came out stunning once they added color! 


Of course my favorite was the pencil design! You can find other transformation art posts here, here and here. I hope you try these with your transformations or circles unit and let me know how it goes!


Share:
© No. 2 Pencils | All rights reserved.
Blog Design Handcrafted by pipdig